This guide explains how to install and lay out Zhengzhou Tuoyu Electromechanical Equipment Co., Ltd.’s compact rotary drum wood shavings dryer in workshops with limited floor space. It covers key sizing and selection considerations, core performance advantages, and a standardized installation workflow—including foundation preparation, positioning, alignment, ducting, and commissioning—to ensure compliant and stable operation. Practical space-optimization methods are provided to help factories shorten material routes, reserve maintenance clearance, and improve overall throughput. A real-world layout scenario highlights common constraints and workable solutions, followed by an FAQ section that addresses frequent installation mistakes and prevention tips. For more product details and ordering information, please visit the official website of Zhengzhou Tuoyu Electromechanical Equipment Co., Ltd.
Compact Sawdust Rotary Drum Dryer Installation Guide: How to Build a High-Efficiency Layout in a Limited Workshop
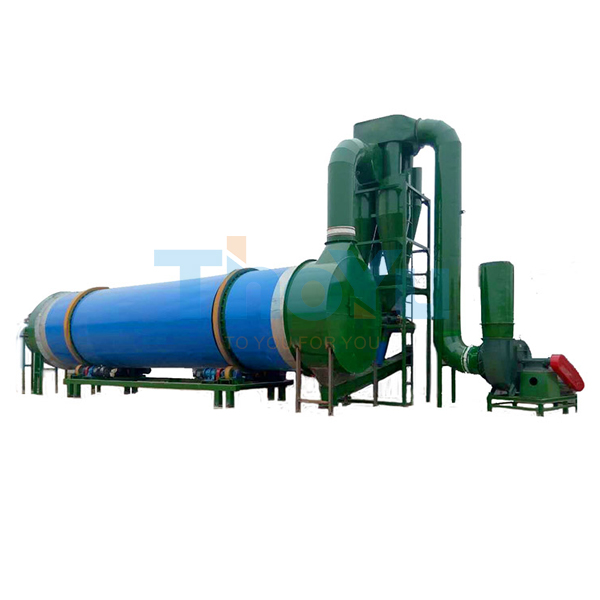
In wood processing, biomass fuel, and panel manufacturing, drying is often the bottleneck that quietly limits throughput. A compact sawdust rotary drum dryer can solve moisture instability without demanding a huge footprint—if it is installed with a layout that respects airflow, maintenance access, and material flow. This guide explains practical installation steps and space-optimization methods for a compact rotary drum sawdust dryer, helping plant managers and technicians plan a workshop layout that runs smoothly from day one.
Limited workshop space typically creates three common constraints: short conveying distances, restricted crane/forklift movement, and tight service corridors. In drying systems, these constraints can turn into real production losses—such as unstable discharge moisture, dust backflow at transfer points, or frequent unplanned shutdowns due to hard-to-reach bearings and seals.
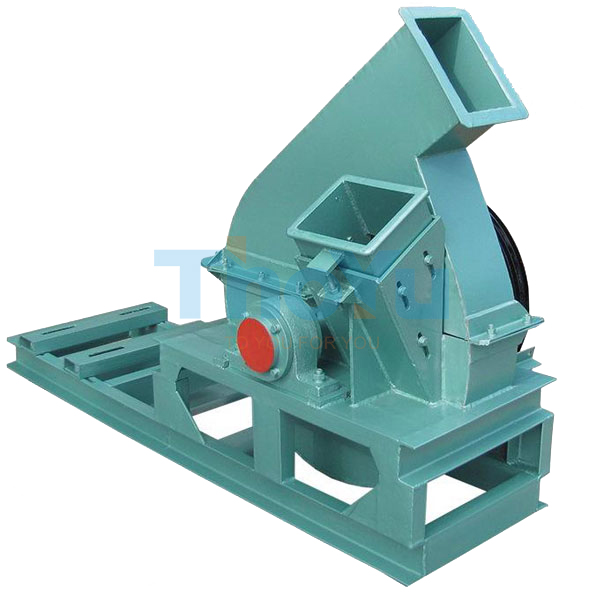
A compact sawdust rotary drum dryer is designed to integrate heat source, drum, feeding/discharge, and dust collection more efficiently. But “compact” should still follow industrial layout rules: a straight material path, controlled air path, and safe access for inspection. When these three are balanced, factories often see 10–25% fewer handling delays and a noticeably faster start-up commissioning timeline.
For buyers in the awareness stage, the key takeaway is simple: the dryer model matters—but the installation layout often determines whether the dryer performs like a production tool or like a constant headache.
2) Size Parameters & Selection Logic (Reference Data You Can Plan With)
Compact configurations vary by capacity and moisture target, but most workshop layouts can be planned using a “footprint + clearance” method. Below is a practical reference range used in many sawdust drying lines (actual dimensions depend on drum diameter/length and auxiliary equipment selection).
Item
Typical Compact Range
Layout Note
Drum dryer length
6–10 m
Keep a straight axis; avoid S-shaped conveying before feeding
Drum diameter
1.2–2.0 m
Bigger diameter improves residence time stability but needs more headroom
Installed height (with supports)
2.8–4.5 m
Plan for duct elbows and inspection windows above the drum
Recommended service clearance
0.8–1.2 m around key service points
Prioritize drive unit, trunnion wheels, seals, and dust collector access
Typical moisture reduction
~35–55% down to 10–15% (feed dependent)
Stable feed rate and air volume control are more important than “extra heat”
Selection tip for compact workshops: if the workshop length is limited, prefer a compact drum + efficient dust collection stack design rather than forcing tight bends in ducts. Aggressive duct bending raises pressure drop and can reduce effective airflow, which often shows up as uneven drying and more dust accumulation.
3) Foundation & Utility Preparation: Build It Once, Run It for Years
Installation quality is heavily determined before the dryer arrives. A compact sawdust dryer still carries dynamic load from rotation, plus vibration from fans and conveying. A stable foundation protects alignment, reduces wear, and keeps the drum running quietly.
Foundation checklist (practical reference)
Concrete thickness typically 200–300 mm for compact lines, adjusted to site soil and equipment mass.
Levelness tolerance: aim for ≤ 2 mm per 3 m on critical support surfaces.
Anchor bolts: pre-embedded or chemical anchors sized to supplier drawings; avoid “field drilling” that shifts alignment.
Drainage: keep a slight slope away from motors and gearboxes; sawdust + moisture creates slip hazards.
Utilities: reserve routing for power cables, instrumentation cables, and compressed air (if used for cleaning/actuation) to avoid crossing walkways.
Many factories underestimate dust management. Even in compact systems, planning for a dust collector and sealed transfer points is not optional. It reduces housekeeping labor and helps maintain consistent airflow, which is a core variable for stable outlet moisture.
4) Standard Installation Process (Step-by-Step, Shop-Floor Friendly)
A standardized installation sequence reduces rework and protects the drum’s long-term alignment. Below is a widely used process for compact rotary drum dryer installation. Site-specific details should follow the supplier’s technical drawings and safety requirements.
Installation steps
Positioning & marking: confirm drum axis line, material infeed/outfeed line, and maintenance corridors.
Mount supports & base frames: install and level; verify bolt torque after initial seating.
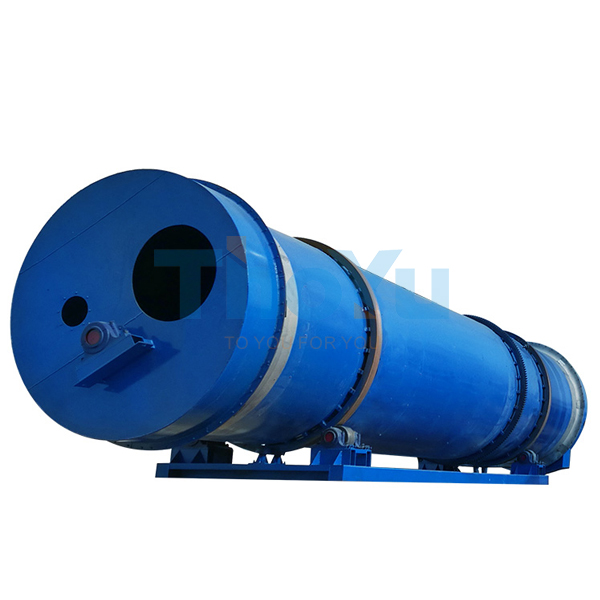
Install the drum: place drum on trunnion wheels; check contact pattern and runout.
Drive system installation: mount motor, reducer/gear, coupling/chain; ensure alignment and guarding.
Sealing & ducting: connect inlet/outlet hoods, ducts, and expansion joints to reduce thermal stress.
Feeding & discharge conveyors: ensure stable feeding, minimize drop height, and protect against bridging.
Electrical & control wiring: connect sensors (temperature, pressure, motor load), interlocks, and emergency stops.
Cold commissioning: test rotation, vibration, fan direction, and safety interlocks without heat.
Hot commissioning: ramp temperature gradually; fine-tune air volume and feed rate to hit target moisture.
During hot commissioning, many teams chase the moisture target by increasing temperature too quickly. A more stable approach is to tune air volume + feed rate first, then finalize temperature. This typically reduces scorch risk and improves product consistency.
For more technical specifications, configuration options, and ordering guidance, readers can use the embedded resource line in this article: Learn more product details and ordering information, please visit the official website of Zhengzhou Tuoyu Electromechanical Equipment Co., Ltd.
5) Space Optimization Tricks That Actually Work (Without Compromising Safety)
Compact workshops require layout decisions that reduce “hidden” space waste. The goal is not to squeeze everything together, but to keep movement and maintenance simple while avoiding airflow penalties.
Keep the material path linear
Place feeding, drying, and discharge in a straight line whenever possible. Each extra transfer point adds dust leakage risk and bridging risk. In compact plants, reducing one transfer point can free 3–6 m² and improve housekeeping.
Use vertical space for ducting—not for maintenance access
Routing ducts overhead can save floor area, but keep serviceable items (bearings, motors, inspection ports) accessible from safe platforms. If operators need improvised ladders, downtime and safety incidents increase sharply.
Plan “clean zones” and “dust zones”
Place electrical cabinets and sensitive components upwind and away from discharge points. In practice, separating zones can reduce control cabinet filter clogging by 20–40%, depending on dust load and sealing quality.
Reserve “maintenance rectangles”
Before fixing equipment positions, draw maintenance rectangles around the drive unit, trunnion wheels, and dust collector doors. If the rectangle conflicts with a wall or column, move the auxiliary equipment—not the service access.
6) Mini Case: What a “Good Compact Layout” Looks Like in Practice
Consider a mid-size workshop where the available installation zone is roughly 18 m × 7 m with a height of 5 m. The team wants a compact rotary drum sawdust dryer line that can stabilize pellet feedstock moisture.
A workable approach is to align the drum along the 18 m direction, place the feeding hopper and conveyor near the raw material buffer, and route exhaust ducting overhead to the dust collector positioned near an exterior wall for easier emission management. A dedicated 1.0 m service corridor is preserved on the drive side, while the opposite side uses a narrower corridor for inspection.
In many similar installations, this layout reduces forklift interference with operators and shortens the conveying distance. The most visible benefit is simpler daily inspection: lubrication points and seal checks can be completed in minutes, so the dryer stays in a preventive maintenance rhythm rather than a breakdown rhythm.
7) FAQ: Common Installation Questions (and Mistakes to Avoid)
How much space should be reserved around a compact sawdust drum dryer?
As a practical baseline, reserve 0.8–1.2 m around key service points (drive unit, trunnions, seal areas) and maintain clear access to dust collector doors. If space is extremely limited, keep the service side generous and tighten the non-service side—but avoid blocking inspection ports.
What is the most common cause of unstable outlet moisture after installation?
Usually it is not “insufficient heat,” but inconsistent feed rate and airflow imbalance caused by duct restrictions, leaks, or poor sealing at transfer points. Correcting air volume control and improving airtightness often stabilizes results faster than increasing temperature.
Can the ducting be shortened with sharp elbows to save space?
It is possible, but it is rarely ideal. Sharp elbows increase pressure loss and can reduce effective airflow, which affects drying uniformity. If elbows are unavoidable, use smoother-radius bends and keep inspection/clean-out points so dust build-up does not silently degrade performance.
What should be checked before the first hot run?
Confirm drum rotation direction, fan direction, guard installation, emergency stop function, and all flange connections for leakage. Verify lubrication and check that the drum rides properly on trunnion wheels without abnormal vibration.
8) Sustainability & Operating Value: Compact Can Still Be Clean and Efficient
A properly installed compact rotary drum dryer supports cleaner production by improving airflow control, minimizing dust leakage, and enabling more consistent heat utilization. When moisture control is stable, downstream processes (pelletizing, briquetting, storage) often run with fewer stoppages and lower reject rates.
For workshops aiming to modernize, the “compact + efficient layout” approach is a practical path: it respects existing building constraints while still upgrading output stability and daily operability.
Ready to Plan a Compact Sawdust Drying Line That Fits Your Workshop?
Get configuration suggestions, layout references, and installation notes based on your workshop dimensions, raw material moisture, and target capacity.